
I know it's been all I've been writing about lately, but I wanted to post my thoughts on Saturday's art market before I forget. This was my first tented fair (I did a really small art fair last fall in which we were only allowed to display on 6' tables - no tents), so obviously there was a significant cost for equipment for this fair, along with a significant learning curve in setting up my display.

The Ballston Arts & Crafts Market is a mid-sized market (35 vendors at each market) and is located in an urban square in Arlington, Virginia - in an area with a lot of condo buildings, and restaurants and shopping within walking distance. It was the perfect size for me. I think it's the kind of market that people who live nearby enjoy strolling through on Saturday morning as opposed to being a destination that people mark on their calendars and drive great distances to attend. It was never packed with people, but there was definitely enough traffic and sales to make it worth my while!
We arrived an hour before the market to set up - and I am so grateful for Larry and a friend who stopped by to do the heavy lifting and assist with the tent set-up. My spot was located between Holland Cox and Jenny Wren Jewelry. They seemed to be experienced in the art market circuit and I'm sure anyone who walked by was amused by the comedy of errors that occurred as we attempted to set up - it was obvious we were new at this! But once we figured out how to hang my banner right-side-up (oops!) and with bungees instead of rope, I was in business!
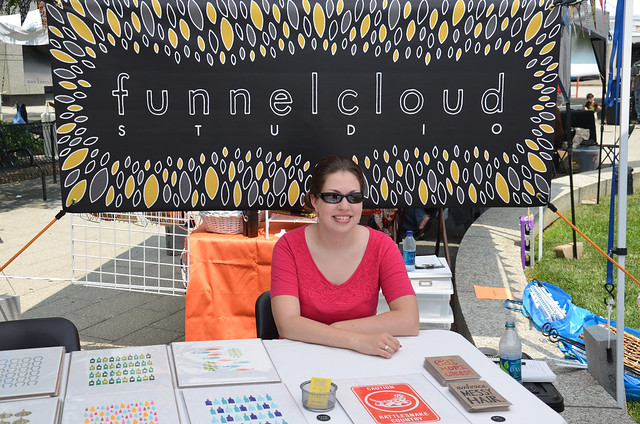
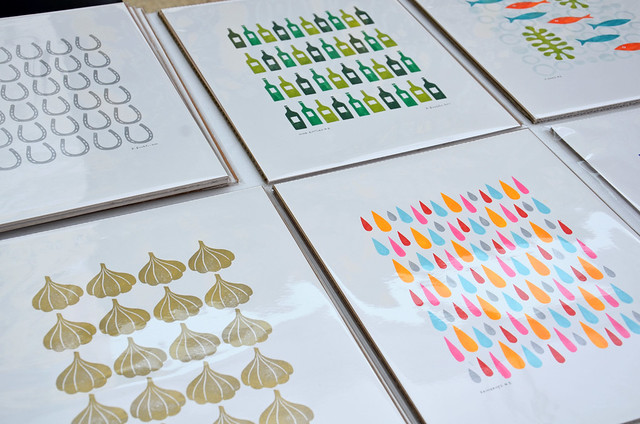
Despite the heat, it was an enjoyable day. All my local friends, and of course my mother, stopped by to check out my booth and offer support and encouragement! (And yes, my own mother insisted on buying something from me!) And I had a great time chatting with some of the other vendors - especially Kate from Udacha and Amy from Interlaken Soak Company.
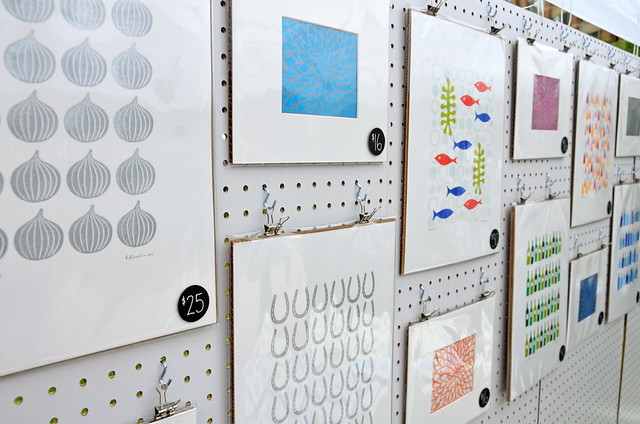
I was really pleased with my display, which is a relief considering how unsure I was feeling about it before the market. I had decided to use pegboards for my vertical display because I don't like the look of those metal grid walls (and they are expensive!) and the mesh walls, while attractive, cost hundreds of dollars. I ended up loving the fact that the pegboards created a white "wall" behind the art which really made it stand out, and I also liked the industrial look.

But most importantly, I made sales! In fact, it was the second most profitable day in terms of gross sales in the history of my little shop. With any art market, you need to cover the booth fee, but in my case, since this was my first fair, I also wanted to cover the cost of all my equipment - the tent, display system, weights, etc - and I came pretty close. I also found it interesting that while my smaller, cheaper pieces are by far my best sellers in my online Etsy shop, the exact opposite occurred at the fair - my larger, more expensive pieces were the most popular and my cheaper pieces did not sell well. It was great to make more money by selling fewer items - and I think it's a good sign that my new 11x14 prints were the most popular items. We'll see what happens when I list them in my Etsy shop later this week.

Lessons Learned and Other Thoughts:
1. Bungee cords! Bring lots of bungee cords! These work much better than rope or velcro.
2. Bring a battery operated personal fan. It was HOT!
3. The cash box is a pain in the ass. Use a money belt instead.
4. Hanging up all my pieces on the pegboard took much longer than expected. I was sweating trying to get everything up as the fair was starting.
5. The tent sites might not be on level ground and adjustments have to be made to get things to hang straight.
6. Bring a few bags - a few customers asked for them to carry their purchases.
7. Several customers wanted to pay by credit card. I still don't think I want to complicate things and accept credit cards and it didn't end up costing me any sales (the customers went to a nearby ATM), but it's something to think about. If I do a bigger market, I'll definitely have to figure out how to accept credit cards.
8. Bring a book for when business is slow.

You'll recall that I had quite a To Do List before the market. Here's an update on how I did:
DISPLAY TO DO:
- Buy a 10x10 tent/canopy. (Done. I got a Quest tent from Dick's Sporting Goods.)
- Buy another folding table. (Done. bought it at Home Depot. Oddly enough, they're located next to the rolls of carpet padding.)
- Build a display system. (Done. I used pegboard which was hung from the tent structure with zip ties. I used S-hooks and binder clips to hang my art from the pegboard.)
- Make tent weights. (Done. Larry helped me build these with lengths of PVC pipe filled with sand and capped off.)
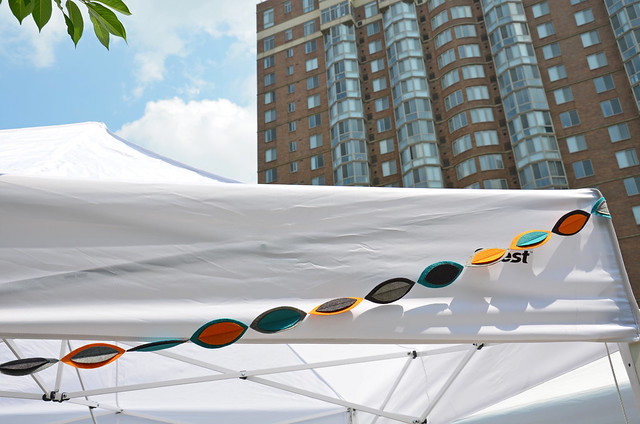
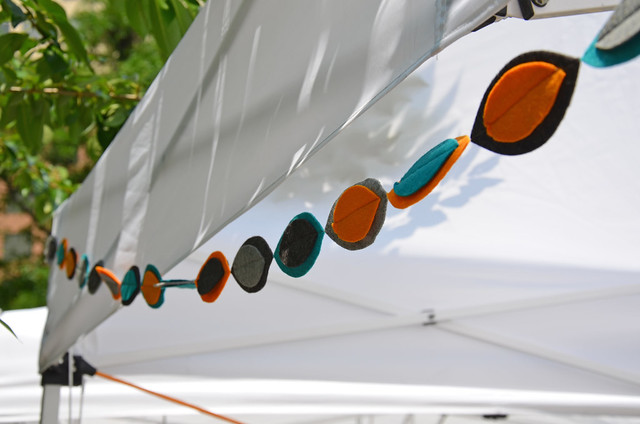
- Make a garland to decorate my tent. (Done. In a stroke of genius, I sewed neodymium magnets - aka super magnets - into the end pieces which made it super easy to attach the garland to the tent.)
- Figure out how to hang my shop banner. (Done. Bungees are the answer.)
- Make tablecloths to cover the tables. (I ended up borrowing tablecloths from Mom at the last minute - they weren't perfect, but did the trick. Also, I don't know why I thought sewing tablecloths would be a good use of my time. Instead, I'm going to buy fitted banquet table tablecloths for the next fair.)
- Boxes to display small pieces/business cards. (I laid the small pieces flat on the table. Biz cards went in a mesh cup.)
- Test run of display and set-up. (Sort of - but we figured out a lot of things on the fly as we set up at the market.)
- Figure out how all this crap is going to fit in my car. (Amazingly, it did. Go Mazda!)
ART TO DO:
- Create 8 new art pieces. (I made 6 new pieces and was happy with that.)
- Design and print a new screenprint. (Nope. I decided to stick with the block prints for this one. Hope to get back into screenprinting this month though.)
- Have giclee reproductions printed. (Nope. Another project for the summer.)
- Print additional Hair, Cheese, Zinnia, Onion, and Blueberry prints. (Done.)
- Cut cardboard backers. (Done. By the way, this might be the worst task in running an art business!)
- Package up art. (Done.)
- Make price tags. (Done. I punched circles in black paper with my circle punch and wrote the prices on with silver ink - really liked the way this looked.)
WHAT NOT TO DO:
- Freak out. (Yay, I didn't freak out! I did get a bit discouraged a few days before the fair with all that I had to get done, but it all worked out in the end, and I was even packed up and in bed before midnight on the night before the market.)
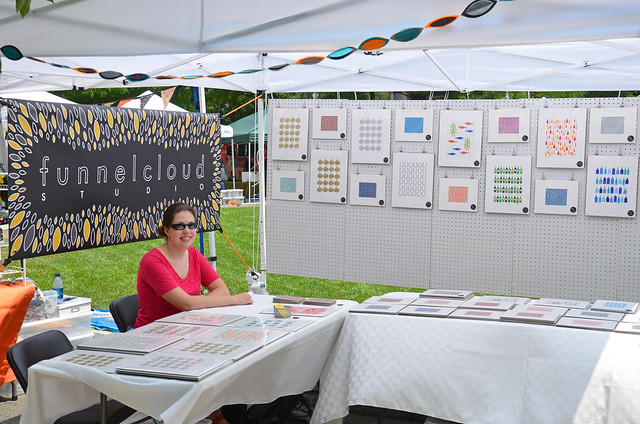
I'll be at the Ballston Arts & Crafts Market again on October 8th and I'm already thinking about what other markets I might like to try. Perhaps a holiday market? Anyway, it's never too soon to start a To Do List for the next one. So in addition to creating lots of new art pieces, here's what I've got on my list for the next market:
- Buy ratcheting moving straps with S-hooks to hang my weights from the corners. These should work much better (and be quicker to install) than tying rope!
- Buy more orange bungees to secure weights to tent legs.
- Buy a money belt.
- Buy a few paper shopping bags.
- Order a narrow banner to display my shop name at the front/outside of the tent.
- Order two fitted tablecloths. Customize them if necessary.
- Buy a plastic bin for storing tablecloths. (So they don't get covered with dog hair!)
- Make more garlands.
- Clean the purple PVC solvent off the weights.
- Research how to accept credit cards.
- Consider creating a second pegboard wall - if I have enough art to display.
- Other things to sell: original paintings/collage pieces on wood, watercolors/gouache pieces, screenprints, and giclee prints.
- Apply to more markets and fairs!



12 comments:
Hey Rachel--if you'd like some advice about Art Markets in the area, just shoot me an email. Be happy to help.
Jess
For credit cards, I would go with Square - www.squareup.com - if you have an iPhone, iPad, or Android gadget.
I've used them for both business and personal charges and I'm excited to use it at my first show in July.
Simple, low fee, free card reader, very easy to use.
Thanks, Rachel Anne! Several people on Facebook have recommended the Square to me, so I'm going to check it out for next time. I've seen it before, but I never thought I would make enough sales to justify it!
Good luck with your first show - it's a lot of work and a lot of fun! I'm loving your new necklaces by the way!
if you can get by without taking credit cards i would. with my business, the fees are kinda expensive. (and i have low rates!) if i was visiting a both like yours i'd expect to pay cash.
@Michael - that's what I thought, too, and I would always expect to pay cash at an art market. I expected my customers to make purchases in the $25 range, but I had a customer spend over $100, so her request to pay with credit was reasonable. I'm going to look into the Square that other people have recommended and if the fees are similar to what I'm paying to Etsy/Paypal for online sales, then it might make sense for me!
I really liked your art show overview, it was really helpful. Your white pegboards have inspired me! Good luck at your next show.
Thanks, Boarding. The pegboards worked quite well for displaying two-dimensional art work!
OH my, you are my inspiration!! Doing a tent at a saturday market is on my list of life goals!! This makes me want to get started today!!
Maybe I will make a little trip on October 8th to come see you!! :)
Thanks, Karen! You should definitely apply to some markets - I've only done two, and they've both been fairly small, but I've learned so much from the experience!
Ive just been researching different ideas on setting up a art market stand, and came across your blog. Your stall looks gorgeous, love how you hang your banner, lots of great ideas. Thanks for sharing
I recently came across Turner Book Writers, and I must say, I’m truly impressed by the level of expertise and professionalism they bring to the table. If you’re looking for professional book publishing serivces , Turner Book Writers is a fantastic choice. Their team ensures that every step of the publishing process is handled with care, from editing to design and distribution. It’s clear that they’re passionate about helping authors bring their stories to life. Highly recommend their services to anyone serious about publishing a quality book!
If you're facing issues with your sewerage line, Drain Unblocking Ghent offers the best solution. Our Drain Unblocking Ghent service ensures that your sewerage system is clear and functioning properly. With years of experience, we provide fast and efficient service, restoring your peace of mind. Don't let drainage problems disrupt your day—contact Janssens Services for reliable and professional unblocking services in Ghent!
Post a Comment