Showing posts with label handmade holiday. Show all posts

Friday, December 14, 2012

handmade holiday | yarn ball ornaments

handmade holiday | yarn ball ornaments
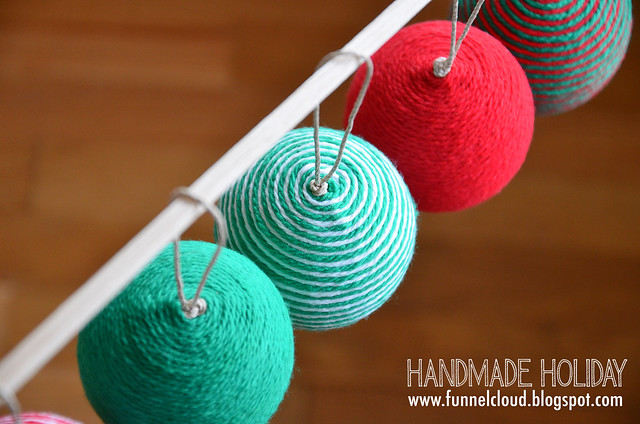
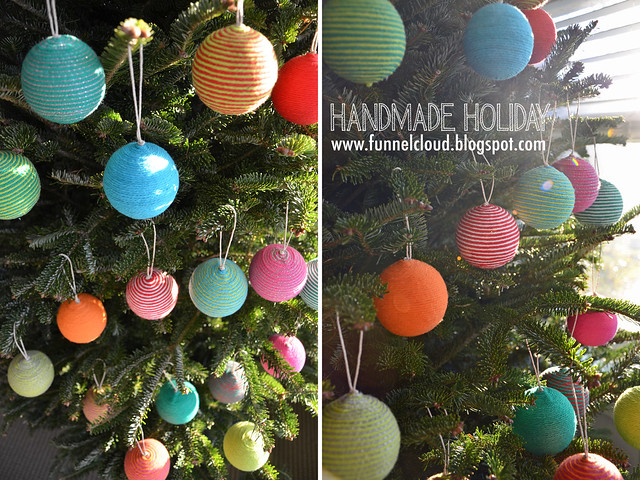
More balls! Glitter balls, sequin balls, wood balls, and now yarn balls, which were my favorite ornaments from last year. They were easy to make and added a lot of color to my tree. I became a little obsessed with making every possible color combination and spent all my TV watching time last December making MORE YARN BALLS.
handmade holiday | yarn ball ornaments
I initially tried making these with thick wool yarn (as inspired by these), but didn't like the lumpy look that resulted. I ultimately found some thin smooth cotton yarn that worked perfectly for creating a more modern look. Acrylic/synthetic yarn will not work for this project (acrylic won't stick to the glue), so make sure you use a natural yarn.
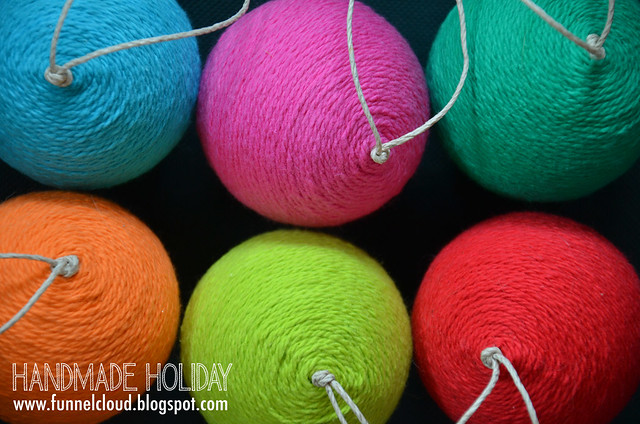
handmade holiday | yarn ball ornaments
Materials | styrofoam balls, cotton yarn, glue, hemp twine
Equipment | scissors, pins

Instructions:
1. Cut a length of twine and knot at the end to make a hanging loop.
2. Glue the knot to the styrofoam ball. Splay out the tails of the twine and make sure they are glued flat to the ball, too. Stick a few straight pins through the knot and tails to secure to the ball and allow the glue to dry. Remove pins.
3. Apply glue to the top of the ball and start wrapping the yarn in a spiral around the hanging loop knot.  To make the striped balls, wrap two colors of yarn simultaneously.
4. Keep gluing and wrapping and patting the yarn into place until the whole ball is covered.

I had no problems getting the cotton yarn to stick to the glue, but if you have any areas where the yarn is coming off the ball, just stick a straight pin through the yarn to secure until the glue is dry.
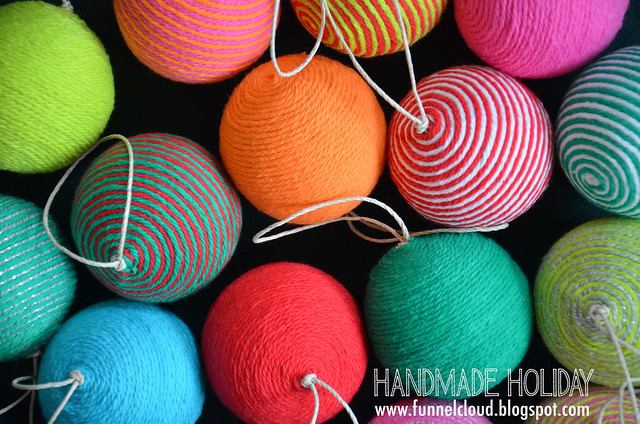
handmade holiday | yarn ball ornaments

Thursday, December 13, 2012

handmade holiday | modern painted wood ball ornaments

handmade holiday | painted wood ball ornaments
Most important news first: We finally got our tree last night! It wasn't nearly as romantic as cutting down our own tree or going to a tree farm as we've done in the past, and it did involve a trip to THREE suburban Christmas tree lots, but we have a tree, it is set up in our living room, and the whole house has that wonderful pine smell.

One small problem: Of our seven strands of Christmas tree lights, only two of them work. Last night's errands also involved trips to two big box retailers, neither of which have Christmas lights in stock. Ok, so they have Christmas lights in stock, but they're the garish colored lights that play music. Wop wop. Where can I get a few strands of plain ol' white twinkle lights?

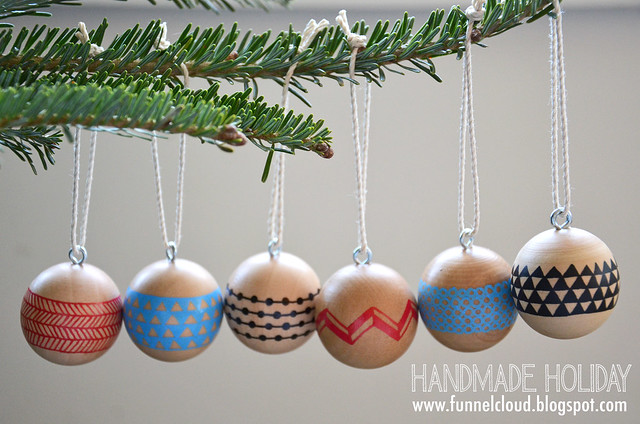
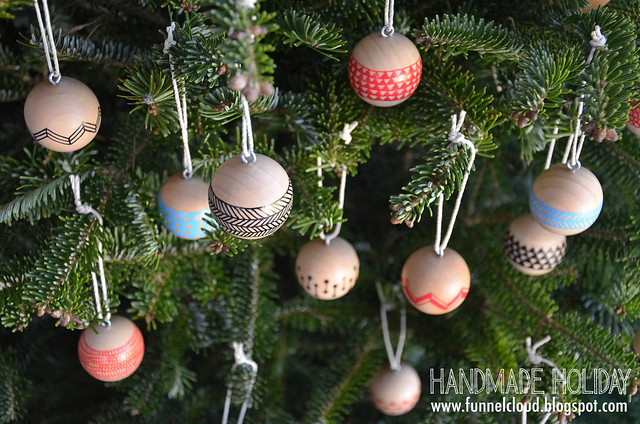
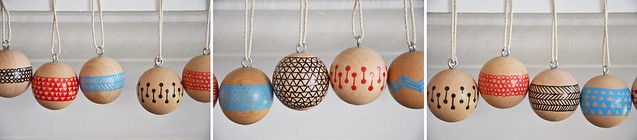
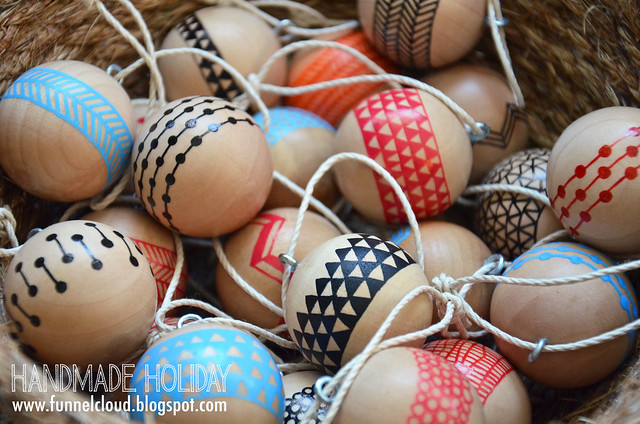
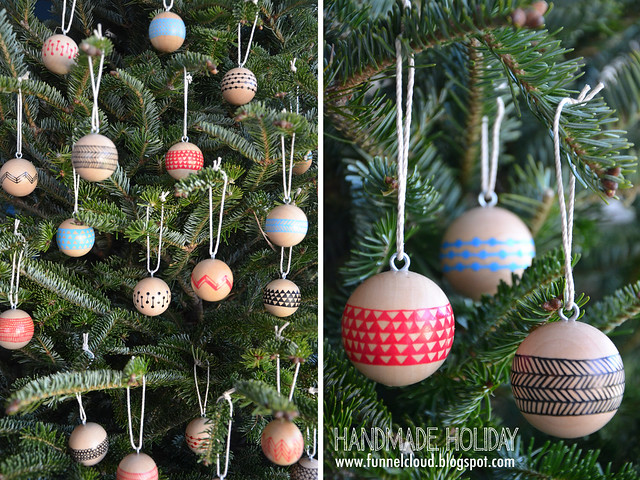
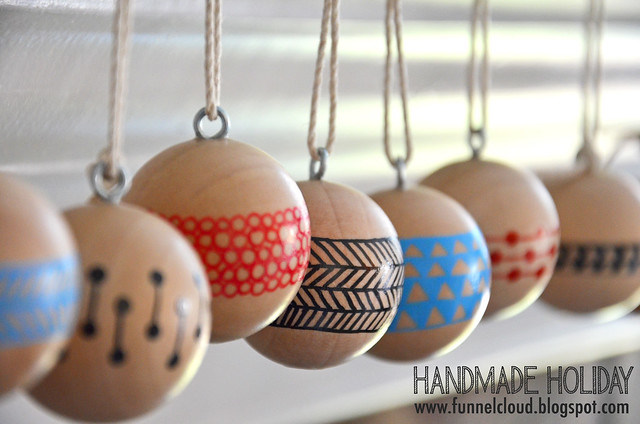
Hopefully, the light problem is resolved quickly, because I can't wait to get our ornaments up on the tree - specifically, these modern hand-painted Scandinavian-ish wood balls:
handmade holiday | painted wood ball ornaments
These ornaments were the inspiration for this year's Scandinavian-themed tree and they are my favorite of all the ornaments I've made over the past few years. I first starting making them at the end of the summer and just finished painting a second batch this week. I love them so much that I considered selling them in my shop for holiday markets, but then realized I didn't want to spend the entire holiday season painting ornaments!
handmade holiday | painted wood ball ornaments
Materials | wood balls, screw-eyes, polyurethane (satin finish), paint pens, hemp twine

Instructions:
1. Screw the screw-eyes into the wood balls. I accomplished this using brute strength and a pair of pliers.
2. Snicker to yourself about screwing wood. And balls.
3. Thread the twine through the screw-eye and tie in a knot to create a hanging loop.
4. Dip the balls into polyurethane. Hang to dry. Dip a second time and allow to dry completely. The polyurethane provides a smooth finish to accept the paint and prevent it from soaking into the wood and bleeding. (As the balls are drying, be sure to wipe off the excess polyurethane that accumulates at the bottom of the ball to prevent the drip from drying.)
5. Draw geometric patterns on the balls with the paint pens and allow to dry.
handmade holiday | painted wood ball ornaments

Wednesday, December 12, 2012

handmade holiday | sequin balls

handmade holiday | sequin balls
Handmade Holiday header
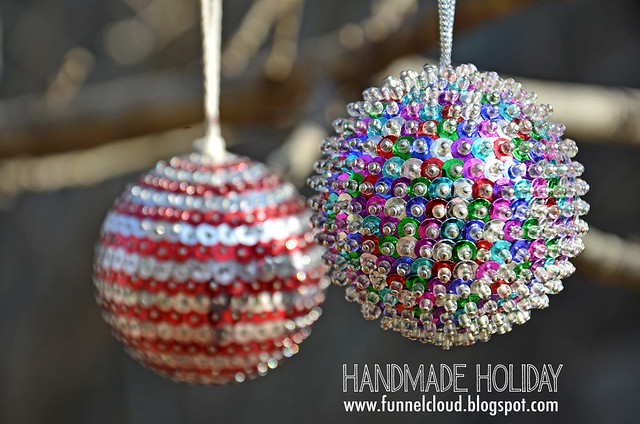
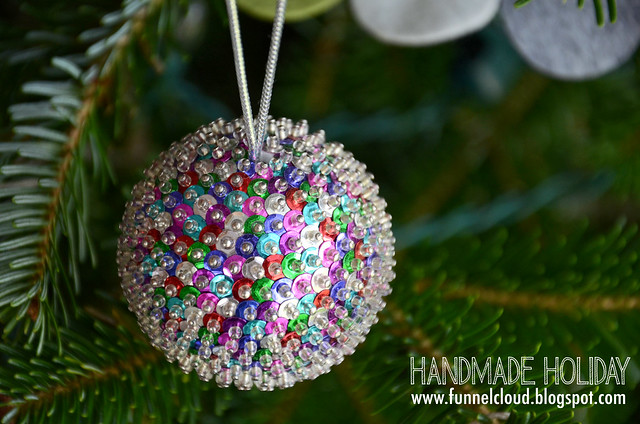
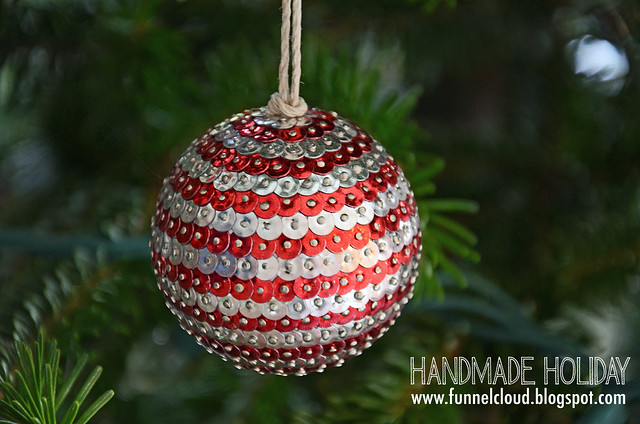
This one's an oldie, but a goodie tedious and painful project: sequin balls. Every Christmas tree needs a little bling, right?

Imagine newly-graduated, twenty-something me sitting in my first apartment at Christmas-time with my sad little fake tree. "What this tree needs is some SEQUINS!" I thought. "Lots and lots of SEQUINS!"

I had seen a photo in a magazine of sequin ball ornaments, so I went to the craft store, bought a metric ton of sequins and set about blinging out my Christmas tree. "I will make hundreds of these sequin balls!" I thought. "I will cover my tree with ALL THE SEQUINS!"

Hours later and with blisters on all my fingertips, I had finished about half of one sequin ball. This project is time consuming. And painful. (Might I recommend a thimble?)
handmade holiday | sequin balls
I only finished one sequin ball that year. A few years later (yes, that is how long it took my fingers to recover and for me to forget the pain of making the first one), I finally made a second one. They look great, but I've officially retired from the sequin-ball-making phase of my life.
handmade holiday | sequin balls
Materials | styrofoam balls, sequins, sequin pins, twine or cord for hanging, glue
Equipment | scissors, finger protection, beer, masochistic tendencies
Optional | seed beads if you're really a glutton for punishment

Tips:
+ Are you actually still going to do this project? Did you read my introduction???
+ The styrofoam balls I used had a hole in them, and I used this to attach the hanging cord - which I glued in place and secured with a pin.
+ Work in rows as you pin, keeping in mind that the sequins will overlap like fish scales.
+ Keep going. Only 2,763 sequins to go!
+ Do your fingers hurt? I warned you!
+ Drink enough beer to dull the pain, but not enough so that you end up stabbing yourself with a pin.
+ If you're really crazy you can embellish each sequin with a seed bead. This will make an already time-consuming project take even longer since you have to thread a tiny bead AND a sequin onto each pin. I used seed beads for the first ball I made, and left these off to simplify the process for the second ball.

Happy pinning, you crazy mo-fos.

Monday, December 10, 2012

handmade holiday | felt circles ornament

handmade holiday | felt circles ornament
Handmade Holiday header
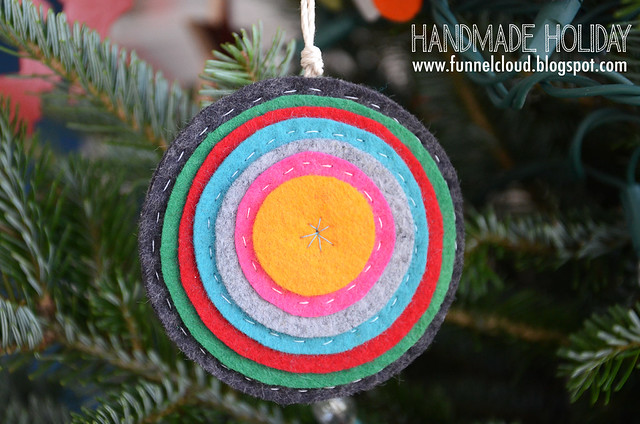
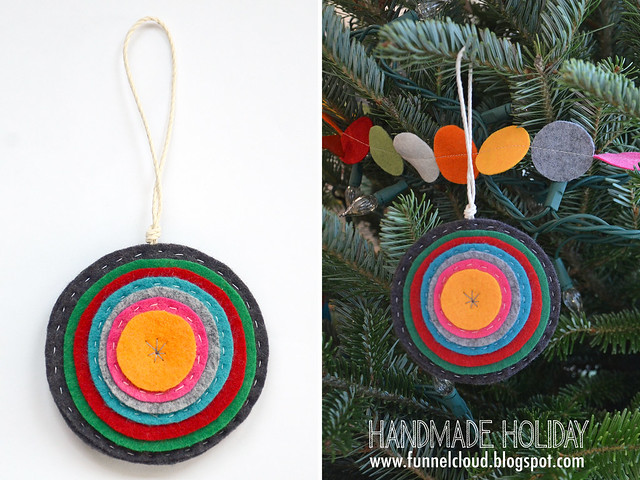
This simple and colorful felt circle ornament was one of my favorites that I made for last year's tree. The instructions are equally simple:

Materials | felt, thread, hemp twine
Equipment | scissors, needle

Tips:
+ I suggest ordering wool-blend felt from American Felt and Craft instead of using the cheap felt from your local craft store. The colors and quality are so much better!
+ I traced a circle to create the middle circle and then freehand cut all the larger circles by cutting around the next smaller-sized circle and leaving an extra 1/4" on all sides.
+ The layers are held together by a few rows of handstitching. As you can see, mine is far from perfect.
+ The ornament is the same on the back as it is on the front. Towards the middle of the ornament I had to stitch through a dozen layers of felt - use a strong needle and some muscle!

handmade holiday | felt circles ornament

Friday, December 7, 2012

handmade holiday | yarn-wrapped cone trees

handmade holiday | yarn-wrapped cone trees
Handmade Holiday header
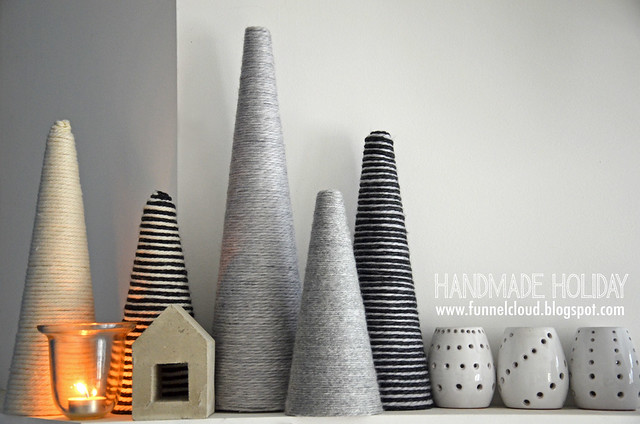
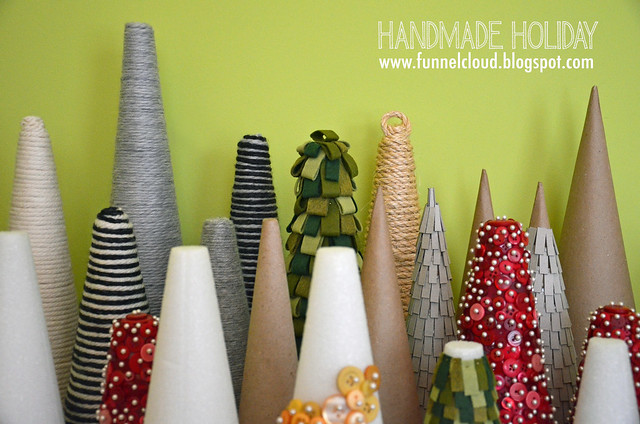
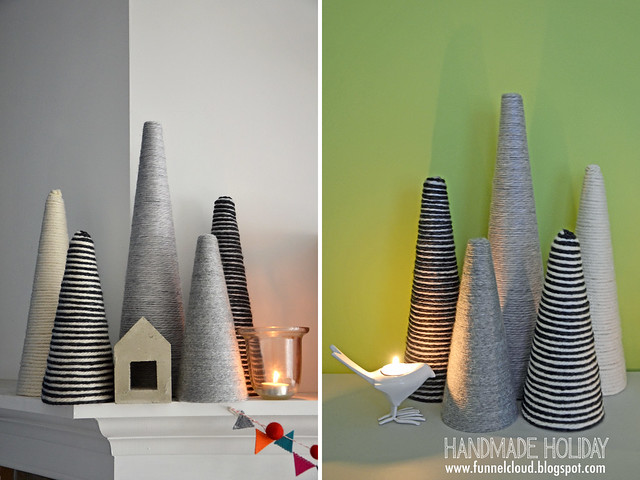
My obsession with making cone trees began in 2007 - back in the day before Pinterest existed and everyone had to come up with their own craft ideas. I was living in a crappy apartment and needed some cheap holiday decorations to cheer things up a bit. My pathetic Charlie Brown Christmas tree really wasn't cutting it that year, so I made a couple of button trees to adorn my equally pathetic coffee table. And every year since then, I've made more and more trees out of styrofoam and cardboard cones - some with felt, some with cardboard shingles, and small forest of these yarn-wrapped trees, which are the quickest and easiest of the bunch.
handmade holiday | yarn-wrapped cone trees
My collection-in-progress of cone trees - both finished and unfinished.

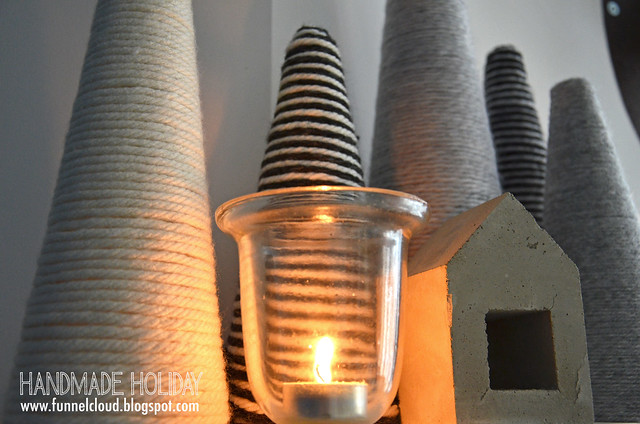
I kept these monochromatic - the shades of gray remind me of a cozy wool sweater. I made the solid colored ones a few years ago. I love graphic patterns, stripes, and black and white, so last night I whipped up the striped trees to give the collection a little more visual interest.

Also, holy crap, it's gettin' all Martha Stewart up in here. Someone find me a beer and my self-respect, stat!
handmade holiday | yarn-wrapped cone trees
Materials | styrofoam cone, yarn, glue
Equipment | scissors, straight pins

Tips:
+ Some types of glue will cause styrofoam to dissolve. White glue works well for this project - I used my favorite glue (Scotch Quick Dry Adhesive) which is my preferred glue for all of my Handmade Holiday projects because it sticks to everything and dries quickly.
+ Wrap the yarn starting at the bottom of the cone, gluing as you go. Use ball-head straight pins to secure the yarn when you start. You can also use the pins as you wrap to keep the yarn in place while the glue dries.
handmade holiday | yarn-wrapped cone trees

Wednesday, December 5, 2012

handmade holiday | cherry ornaments

handmade holiday | cherry ornaments
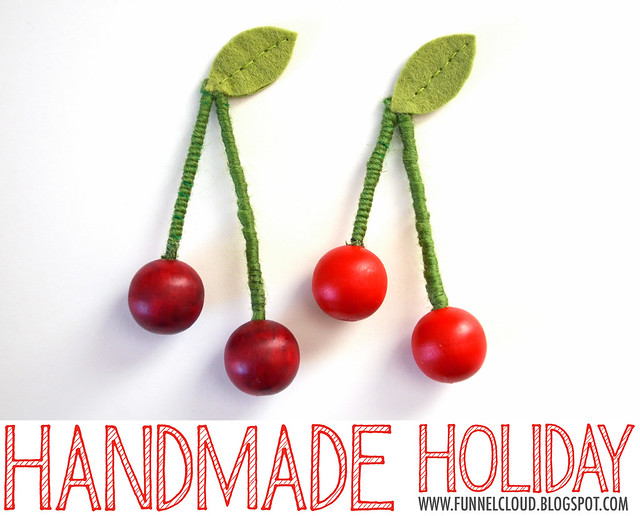
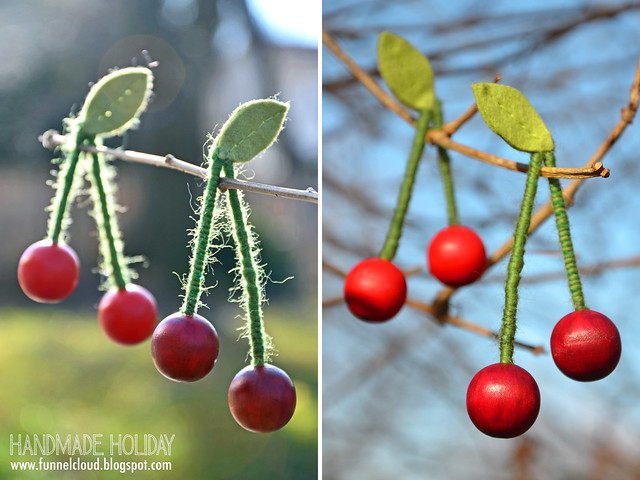
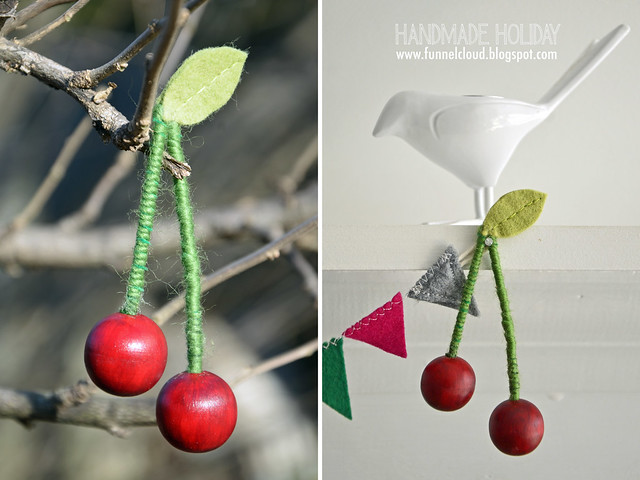
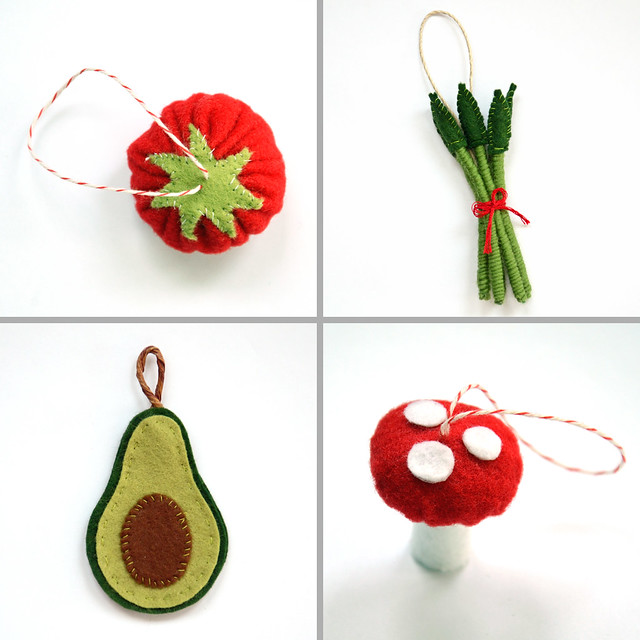
So it seems that I like food-themed ornaments. Last year, I made a tomato, a mushroom, an avocado, and a bunch of asparagus to adorn our tree. This year: more mushrooms. (Though I think they look more like poisonous toadstools. Or Super Mario mushrooms). And now: cherries. I guess adorning my tree with food makes sense, considering how much I like to cook. And eat. (Related: This makes me think that I need a CAAAAAKE ornament!)
handmade holiday | cherry ornaments
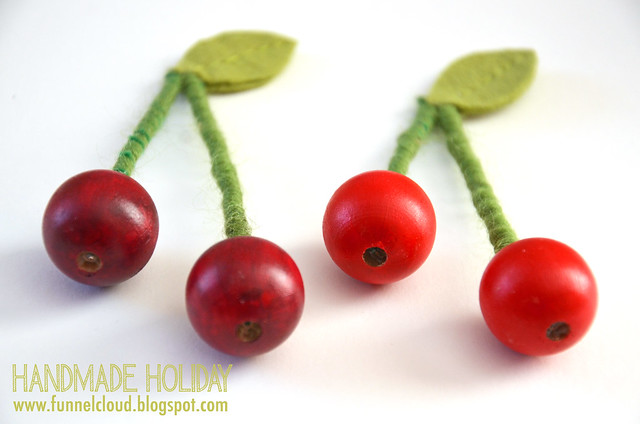
So cherry ornaments: These were one of those "use what you have" projects as yes, I did have all these supplies lying around my studio (because I am an art supply hoarder). I had planned on painting wooden beads for jewelry when I realized red beads would make perfect cherries.
handmade holiday | cherry ornaments
Materials | wood beads, red acrylic paint, pipe cleaners, green yarn, felt, thread, glue
Equipment | paintbrush, scissors, needle

Instructions:
1. Paint the wood beads. (The beads I used are about 7/8" diameter.) An easy way to paint multiple beads is to thread them onto a pipe cleaner. Then you can hold and rotate the pipe cleaner as you paint and also hang the beads to dry.
2. Cut a pipe cleaner to your desired length. Wrap the yarn around the pipe cleaner applying glue to the pipe cleaner as you go. (Some of the pipe cleaner fuzz will show through so use yarn and pipe cleaners that are similar in color.) Leave about 3/4" from the ends of each pipe cleaner unwrapped.
3. Apply glue to the un-yarned ends of the pipe cleaner. Thread the bead onto the pipe cleaner, squirt some more glue into the hole (from the bottom - really there's no way to explain this step without some sort of dirty joke popping into my head, but I think you get what I'm going for here) and allow to dry.
4. Optional: Cut two leaf shapes out of felt and stitch them together. Glue the leaves to the stem. Done.
handmade holiday | cherry ornaments

Tuesday, December 4, 2012

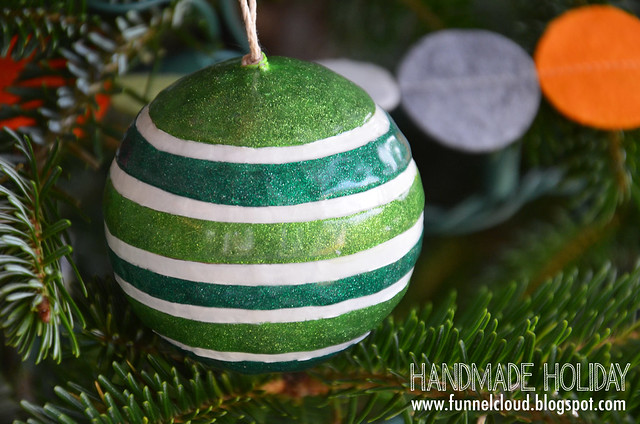
handmade holiday | painted glitter ball ornaments

handmade holiday | painted glitter balls
I have the sense of humor equivalent to that of a twelve year old, so that means I'll be snickering about ball jokes throughout the rest of Handmade Holiday. Today we have...glitter balls...heh...

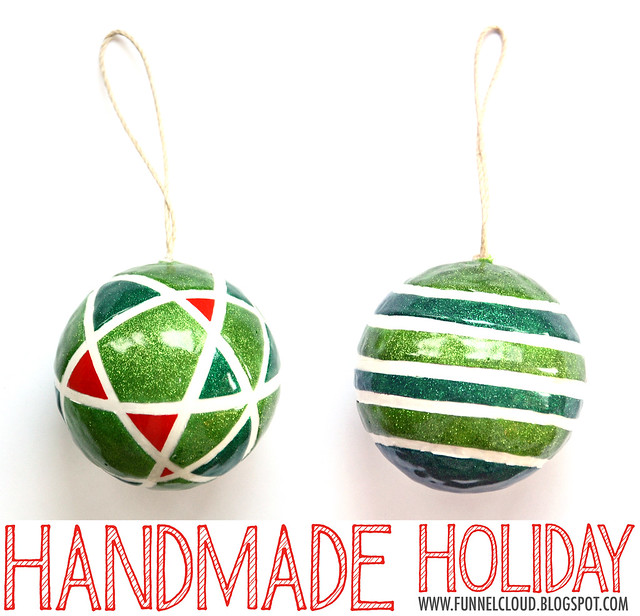
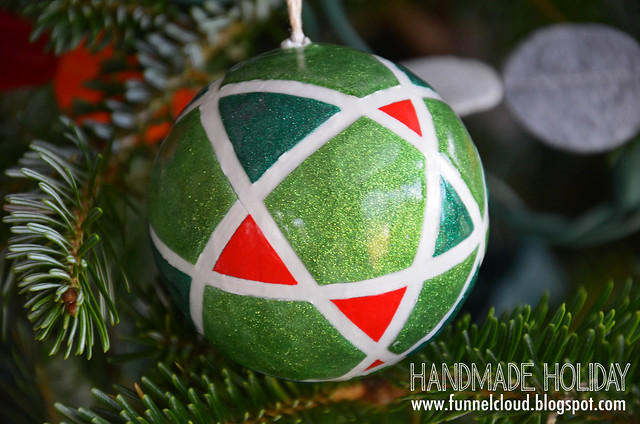
I made these ornaments for last year's tree - I had a lot of pink and orange and non-traditional colors going on, so I wanted to create a few ornaments in traditional Christmas red and green. (And I wanted an excuse to use glitter paint.)
handmade holiday | painted glitter balls
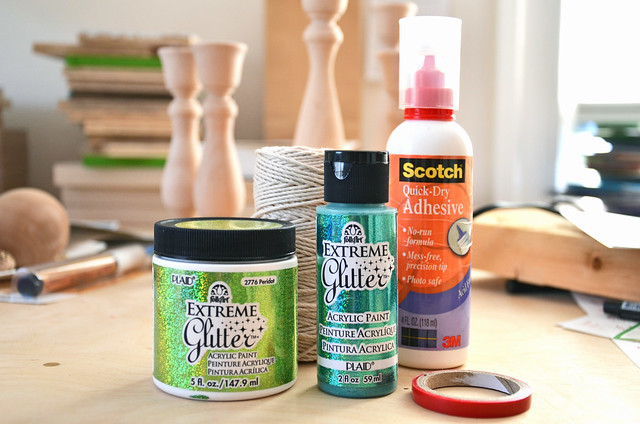
I've gotten requests to include tutorials for the Handmade Holiday projects, and while I'm not a photograph-every-step kind of blogger, I will include some simple instructions/tips and a materials list like I did last year:
supplies
(One of the reasons I don't photograph my process: My studio is always a mess. You definitely don't need wood candlesticks for this project. Or any of that other crap in the background.)

Materials | paper mache ball ornaments (from your local craft store - turns out these are actually plastic balls covered with kraft paper), white gesso/acrylic paint, glitter paint (I used Plaid brand Extreme Glitter), glue, hemp twine
Equipment | artist tape (the thinnest you can find), paintbrush, masking tape, X-acto knife

Instructions:
1. Remove the cheap hanging cord that comes with the ornament. You will be left with a hole to attach a new, non-cheap-looking hanging cord.
2. Make a hanging loop with the hemp twine and knot it at the end. Put a dab of glue around the hole in the ornament and press the knot (with the twine tails inside the hole) against the hole - hold it for a few seconds until it sticks and allow the glue to dry.
3. Protect the hemp twine from paint with masking tape.
4. Paint the ornament with white gesso (or whatever background color you choose) and allow to dry.
5. Use the artist tape to mask off a design on the ball. (Optional: Painting another coat of white on top of the tape may help prevent the colored paint from leaking under the tape.) I found that that the geometric pattern worked better than the stripes because it is hard to get the tape to lay flat and straight for the stripes.
6. Paint the ball using acrylic paint or glitter paint in the sections you have masked off. The glitter paint takes many many coats to get a true glittery effect. It also gives the ornaments some texture. Use the hanging cord to hang the ornament to dry between coats of paint.
7. Remove the tape and touch up any areas where paint seeped under the tape. I had applied the glitter paint so thickly, that it helped to run an X-acto knife along the edges of the tape to get clean lines and avoid pulling all the paint off.
8. Hang your new ornament on your Christmas tree...
handmade holiday | painted glitter balls
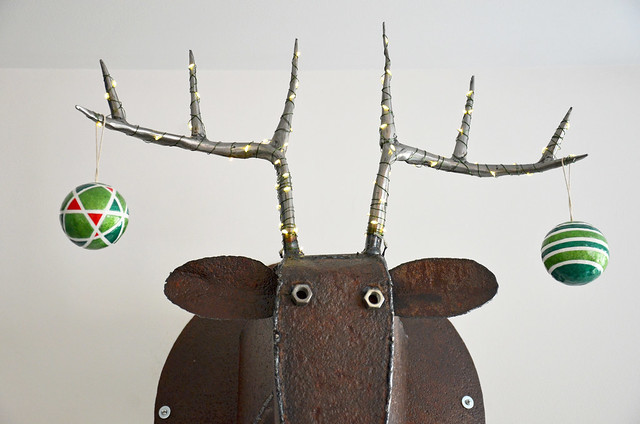
...or on your fake-taxidermied metal deer head. As it turned out, I didn't even end up hanging the glitter balls on the tree last year - I thought they worked perfectly to add a little Christmas bling to John Deere's antlers:
handmade holiday | painted glitter balls

Friday, November 30, 2012

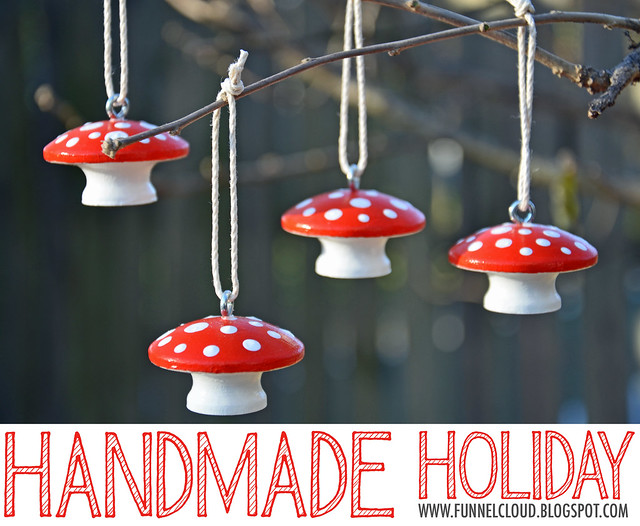
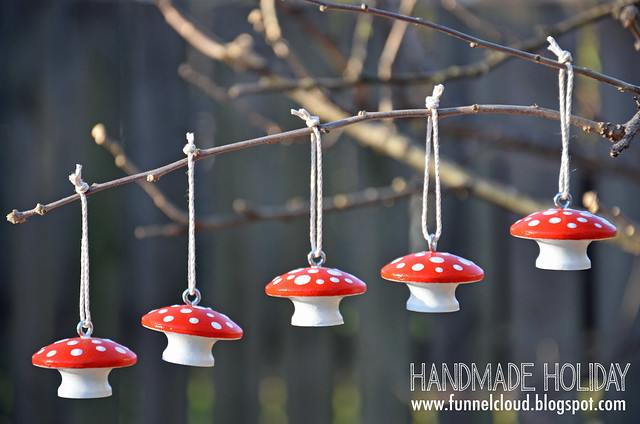
handmade holiday | wood mushroom ornaments

handmade holiday | wood mushroom ornaments
Here we go - the first project for Handmade Holiday 2012: Wood Mushroom Ornaments. I should confess that I do not have my Christmas tree up yet, and considering that I'll be vending at art markets for the first three weekends in December, I'm not sure exactly when we will have a chance to chop down, set up, and decorate a tree this year, but that hasn't stopped me from making ornaments. In fact, I made these mushrooms back in...September...

My plan for this year was to create an entirely new set of ornaments for a new tree. (Did I mention that I'm insane?) Ever since I took down last year's tree, I've had visions of a modern Scandinavian-inspired Christmas for 2012: lots of birch and white, with accents of red and pale blue. Teeny tiny house ornaments. Modern patterns. Natural wood. Kraft paper. Stripes and triangles. Woodland critters. Snowflakes...

However! Christmas is less than a month away and it's the busy season for my shop, so I don't think I'll have time to create an entire new set of ornaments this year. Don't get me wrong, I'll still be making lots of handmade things for Christmas, but I think I'll add them to my collection from last year instead of starting from scratch.

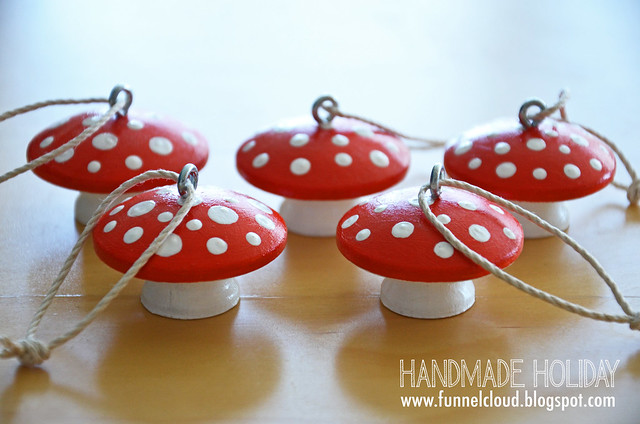
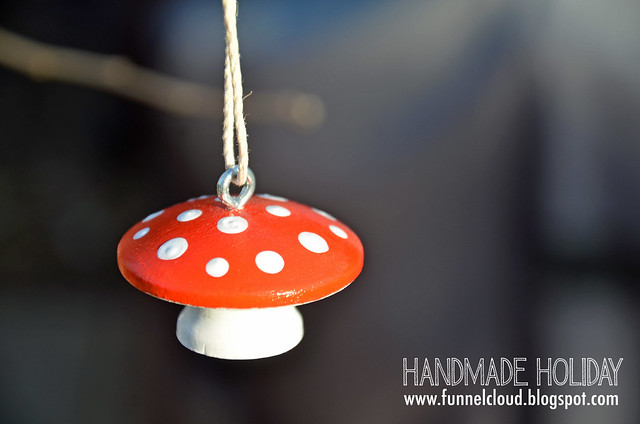
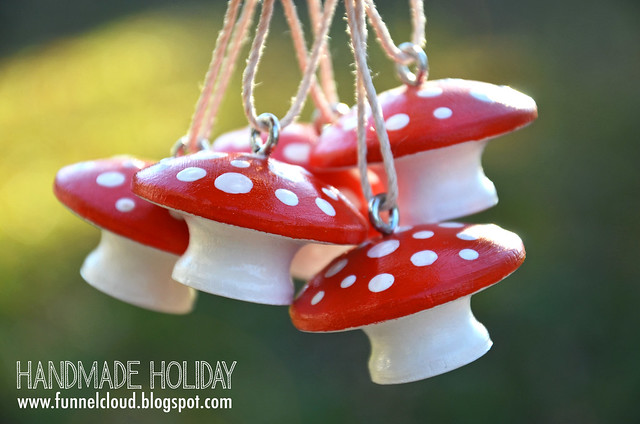
Anyway, at the end of the summer, I had some free time to get creative. With the vision of a Scandinavian/Woodland-themed tree dancing in my head along with wanting to create more mushroom ornaments that didn't involve sewing, I made these little wood mushrooms:
handmade holiday | wood mushroom ornaments
Ever notice that drawer pulls look exactly like mushrooms? Yup, that's what these are - wood knobs. Paint 'em, seal 'em, add a screw-eye and some hemp twine and you're done. I happened to have white paint in a squeeze bottle which made it easier to paint the spots, but a small brush would work, too. Easy.

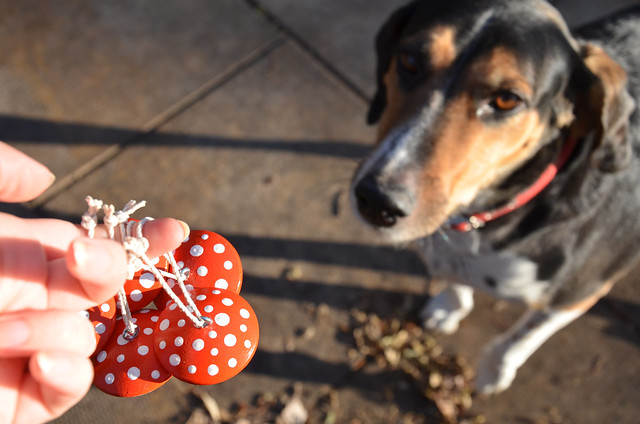
Also, I'm sure doggie photobombs will be a common appearance in my Handmade Holiday photos:
handmade holiday | wood mushroom ornaments
"These for eatin', Ma?"

Thursday, November 29, 2012

handmade holiday 2012

handmade holiday 2012

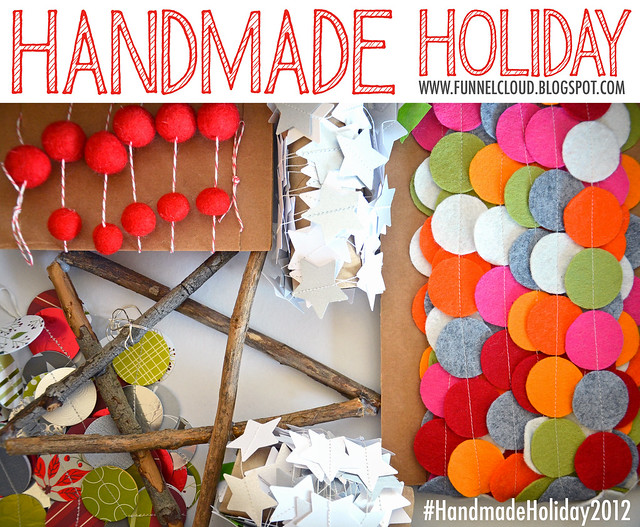
Today is the official kick-off for Handmade Holiday 2012! Throughout the next month, I'll be making and posting handmade ornaments and decorations and other DIY holiday projects on the blog. (I'll also post some of last year's ornaments that I never got the chance to share last December.) I realize it's still November, and I'm typically a strict No-Christmas-stuff-until-December-1st kind of person, but I'm trying to get things done a little earlier this year to avoid the inevitable last minute holiday stress and to allow myself to enjoy December a little more this year. So here we go - get excited! It's time to make stuff!

A little background to Handmade Holiday: Last year, as part of our commitment to have a handmade Christmas, we gave only handmade gifts and I took it upon myself to make every single ornament for our Christmas tree. There were several reasons for this. One - I'm insane. Two - cheap made-in-China crap from big box stores does not belong on a Christmas tree. And three - Christmas brings out the crafty in me - my tastes run modern, so during the rest of the year, I steer clear of tchotchkes and cluttered decor. But at Christmas, all bets are off - I break out the glitter, the glue gun, and the felt and yarn and random pipe cleaners (and maybe a power drill or a soldering iron - just to keep things a little dangerous!) that have accumulated in my studio throughout the year and give myself carte blanche to get crafty for Christmas. The challenge is to use these supplies and still stay true to my modern and somewhat non-traditional aesthetic, so you still won't find anything cutesy here.
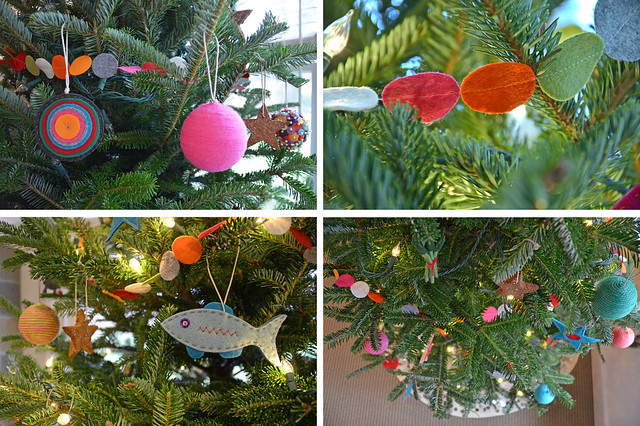
handmade christmas tree 2011
A Handmade Tree - 2011

So starting tomorrow, there will be a new handmade project on the blog and I'll keep posting DIY projects throughout the month of December (with some other random posts sprinkled in) whenever I get a chance between art markets. To get you in the crafty Christmas spirit, here are last year's Handmade Holiday Projects:

+ Felt Food Ornaments | Tomato, Asparagus, Avocado, Mushroom
+ Felt Fish Ornaments
+ Star Ornaments | Wood, Glass, Felt, Cinnamon
+ A Handmade Tree

I made these as ornaments for my Christmas tree, but none of them are particularly Christmas-y, so if you don't celebrate Christmas, these ideas could still be used for other holidays or just general winter or house decorations. Hang them in your window. Put them on your mantle. Decorate your bathroom or bedroom or dining room. Alter them for other holidays: Make the star ornaments have six sides for Hanukkah. Get creative!


Psst! Spread the word and make sure you don't miss any Handmade Holiday posts: 
+ Subscribe to/follow this blog and click on the Handmade Holiday category to see all the posts.
+ Follow @FunnelcloudRach on Twitter. I'll be using hashtag #handmadeholiday2012.
+ Follow @funnelcloud on Instagram. Same hashtag #handmadeholiday2012.
+ Follow Funnelcloud on Pinterest. I'll be posting these projects to my Things I Made board with yup, hashtag #handmadeholiday2012.

(Also, to avoid any confusion, Handmade Holiday is also the name of a fabulous art market held by the Richmond Craft Mafia. My shop will be there on December 8th, however, there is no affiliation between the Richmond Handmade Holiday market and the Handmade Holiday series on my blog.)

Monday, November 19, 2012

holiday cards | christmas octopus

christmas octopus
One of the most frequent comments I get at art markets is "You should sell greeting cards!" And I always smile and nod, but the thing is, I've never planned on selling greeting cards in my shop. The reason why? To be brutally honest: profit. Or lack of profit. To me, it just isn't worth it to sell something that I only make a buck on (or less!), considering it takes me the same amount of time to design a card as it does to design a small print. People may expect to spend $25 on an art print, but no one wants to pay more than $5 for a greeting card. Profitability is obviously a major consideration when you produce your own products and own a business, and I just couldn't figure out how to successfully add greeting cards to Funnelcloud Studio's current product line.

However! I do like designing cards (I freelanced as a greeting card designer last year), and I do like offering seasonal designs for the holidays. So I've been doing some research and calculations and am currently testing out professional printers to find the best quality cards for my designs at the most competitive prices.

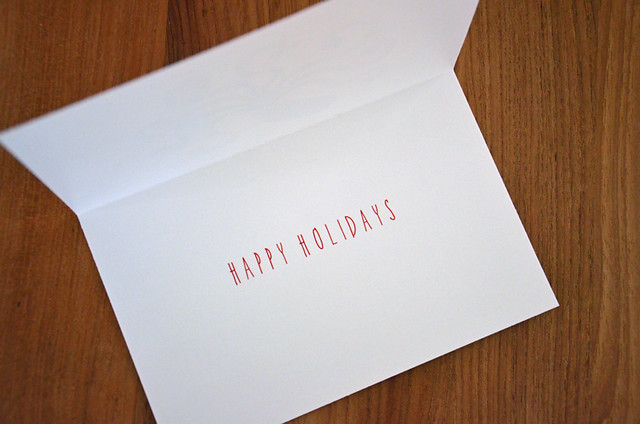
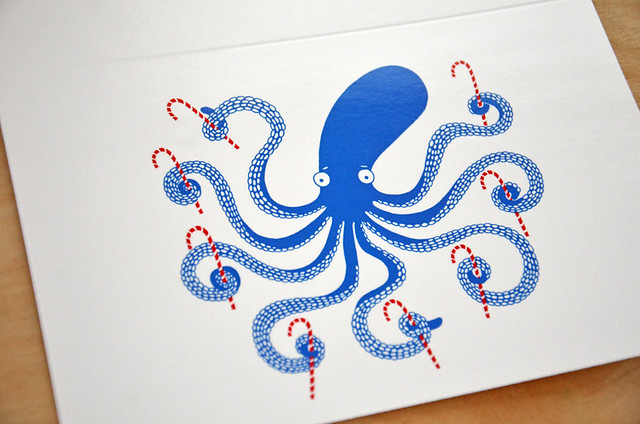
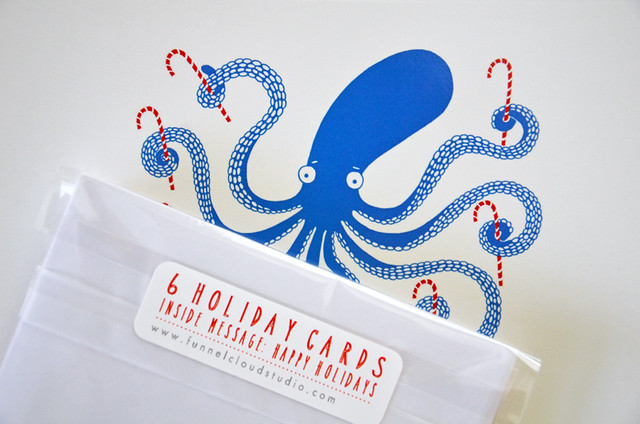
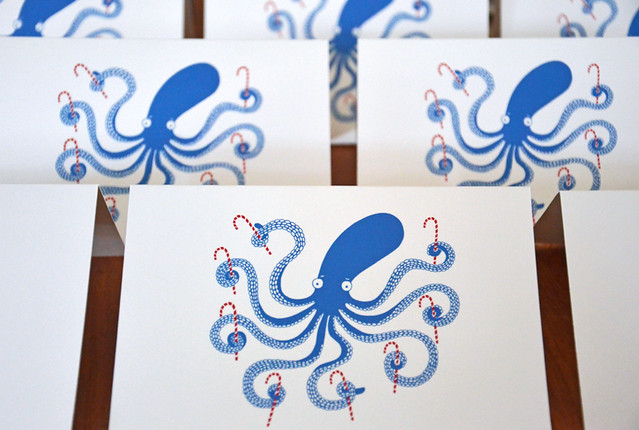
I got the first shipment of cards last week and I'm excited to finally introduce Funnelcloud Studio's first holiday cards! I'm a non-traditionalist when it comes to the holidays, so the first design is a Christmas Octopus!
christmas octopus
christmas octopus
You may recognize the octopus design from a print in my shop. I actually had the idea for an octopus holding eight candy canes last winter. I didn't have the time to design cards for my shop last year, so I revised the idea to include forks, knives, and spoons for a plate design competition this spring. When I didn't win, the design became the Let's Eat - Octopus print in my shop. Anyway, I'm happy to finally have my original candy cane idea come to life, and I think the recipients on your Christmas card list will get a good chuckle when they find this guy in their mailboxes.
christmas octopus
The cards are currently available in sets of six cards (with six white envelopes) in my Etsy shop. I'll also be selling them at my upcoming holiday markets in December. And I hope to come up with a few more designs (and test out a few more printers) before the end of November, so stay tuned...

Friday, December 23, 2011

handmade holiday | felt food ornaments

felt food ornaments


I mentioned that my Christmas tree was non-traditional, but to be honest, it's downright eclectic.

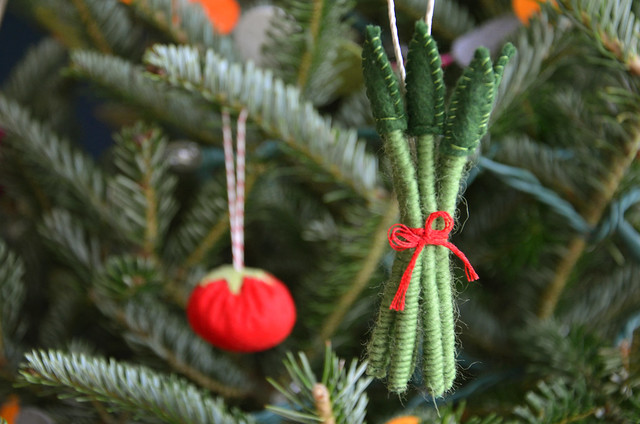
Anyone else have an asparagus ornament on their tree?

(That was another idea that came to me as I was trying to fall asleep. Vegetables on Christmas trees! Insomniacs come up with some weird sh*t in the middle of the night!)

But Larry and I do love to cook, so it's only fitting that our tree have a few culinary adornments. What these particular ingredients make, I do not know (really gross salsa?), but what tree doesn't need a few more veggies? And fruits? And...fungi? (Not to mention if the fungi is red with white spots, I'm pretty sure it's actually a toadstool, and it's poisonous...)


PIPE CLEANER ASPARAGUS
asparagus ornament
Materials | pipe cleaners, yarn, felt, thread, embroidery floss, glue, hemp twine (for hanging cord)
Equipment | scissors, needle
Tips | Wrap the pipe cleaners with yarn, and glue at the ends.
          Create the asparagus tips by sewing a pocket with two pieces of felt. 
          Insert the yarn-wrapped pipe cleaner in the open end of the asparagus tip.
          Sew around the pipe cleaner until the tip is secured to the stalk.


FELT MUSHROOM
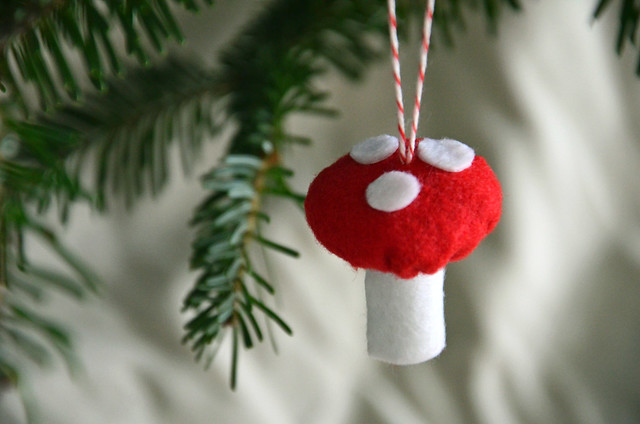
mushroom ornament
Several years ago, I hosted a woodland-themed baby shower and created big felt mushrooms for tabletop decorations. When I saw that Alisa, the host of this year's Freshly Blended Ornament Swap, had created some adorable needle felted toadstool ornaments, I was green with envy that I wasn't on her swap list. I have no clue how to needle felt, but I remembered the technique I had used for the felt mushrooms two years ago and decided to make a miniaturized version for my tree. They're not nearly as cute as Alisa's, but they do the trick.

I had also planned to stuff the caps with poly stuffing, but my studio is such a mess, that I couldn't find any. I found that a cotton ball was the perfect substitute!
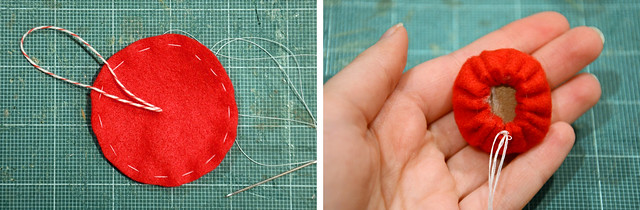
felt mushroom tutorial
Materials | felt, thread, cotton ball, cardboard circle, baker's twine (for hanging cord)
Equipment | scissors, needle
Tips | Make the cap by sewing a loose running stitch around the perimeter of a felt circle (2 1/2" diameter).
          Pull both ends of the thread like a drawstring to create a felt purse.
          Stuff the felt purse with a cotton ball and top with the cardboard circle to create a base.
          Cinch the thread tight and tie in a knot so the mushroom cap holds it's shape.
          Create the mushroom stem by rolling up a piece of adhesive-backed white felt.
          Glue the stem to the cardboard inside the mushroom cap.
          Cut circles out of adhesive-backed white felt to create the spots on the mushroom cap.


FELT TOMATO
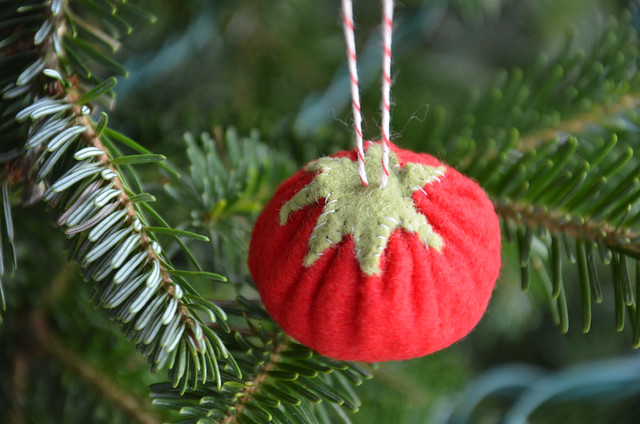
tomato ornament
Materials | felt, thread, cotton balls, baker's twine (for hanging cord)
Equipment | scissors, needle
TipsI made the tomato using the same technique as the mushroom cap (but without the cardboard circle). Use a 4" diameter (or larger) felt circle to create the tomato and stuff with 4 or 5 cotton balls. Then hand sew the leaves on top to cover the opening.


FELT AVOCADO
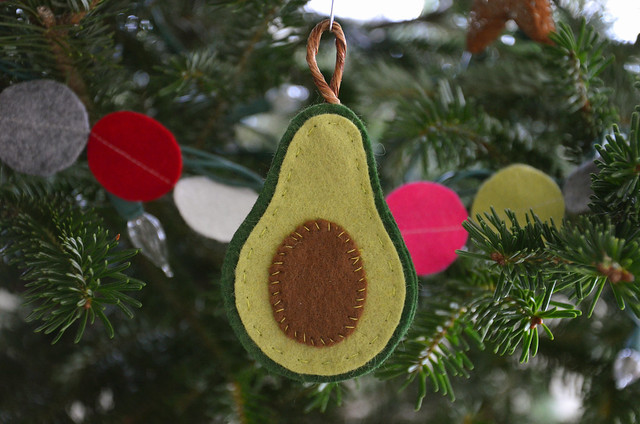
avocado ornament
An homage to my favorite party dip - guacamole!

Materials | felt, thread, wired floral stem (for hanging loop)
Equipment | scissors, needle

Here's to a delicious Christmas!

P.S. Don't eat the toadstools.