Wednesday, August 28, 2013

haleakala national park

haleakala national park
Larry and I hiked a volcano while in Oahu, so it seemed only natural that we'd hike another one once we arrived in Maui. Plus, we are huge fans of the U.S. national parks, so we jumped on the opportunity to check another one off our list while in Hawaii.

Haleakala National Park covers over 30,000 acres, but only a tiny portion of it is accessible to humans.  To truly experience the park involves an overnight hiking/backpacking trip into the crater. We weren't up for that, but luckily you can get a great overview of Haleakala from the summit and hike as far as you want down into the crater and then turn around. The hike back out is a little more of a challenge - one of those slow burning, low-grade hills that never seems to end.

Haleakala's summit is PuʻʻUlaʻula and it is 10,023 feet above sea level. Let me tell you, that is way up there! Since Maui's coast is AT sea level, that means the summit is nearly TWO MILES above the ocean. (It also means you're two miles closer to the sun, which resulted in Larry's neck looking like a slab of bacon by the end of the day.)
haleakala national park
Driving up the volcano on the winding road was a little nerve-wracking. It was hard to photograph the steepness of the drive up since my wide-angle lens tends to flatten everything out, but we drove up above the clouds! We started out among tall trees and ended up in a barren martian landscape at the summit.
haleakala national park
The view from the top was amazing! It really did look like we were on Mars, complete with a little "space station."
haleakala national park
(Evidently, once you're married, you start inadvertently dressing alike...)
haleakala national park
We hiked Sliding Sands Trail into the crater to get a better glimpse at the cinder cones. I took about a thousand pictures, most of which looked exactly the same. I'll try to control myself:
haleakala national park
We slept pretty well that night!

Monday, August 26, 2013

DIY dog feeder

DIY dog feeder
Last September we were on a bit of a building kick. Simple projects, yes, but we built a tub shelf, a shoe shelf, and a dog feeder. Well, we never finished the dog feeder. We built it, and then it sat unpainted in our guest room for eleven months. I'd like to say it was because the day we built it, was the day a tree came crashing into our fence and we were distracted by the clean-up effort. But there's no excuse for taking almost a year to complete such an easy project.
DIY dog feeder
The real reason it took me so long is because I was frustrated. We constructed the feeder using hand-held power tools and a doweling jig, and the resulting craftsmanship was somewhat shoddy:
DIY dog feeder
When we couldn't get the dowels pounded in so that the adjacent parts were flush, Larry gave the whole thing a whack with a rubber mallet, and...it cracked. I had planned to leave the feeder as natural wood, coated with stain or poly, so it looked like an actual piece of furniture, but the imperfections in our construction ruined the whole thing for me. Waaahhh, call me a baby, but I'm a perfectionist and I'm definitely the "If it can't be perfect, I don't want it at all" type, which just might be my most annoying trait. It is the reason 9 out of 10 projects I start don't get finished. I'm trying to get over it.
DIY dog feeder
So, I scratched my plan to stain the feeder, and decided that painting it would be a good way to cover up the imperfections as well as seal up the cracks and exposed joints. (At first, I planned to fix the imperfections with wood putty, but on the day I started painting, I discovered our wood putty was dried up, so I just slapped primer and paint over the whole mess and it worked just fine.) But then I couldn't decide on a paint color. The dog feeder's permanent location will be in our mudroom/soon-to-be walk-in pantry (though that is a story for another day), so I could get away with using a fun, bright paint color. I finally decided that rather than buy a new can of paint, I would use paint that we already had, specifically, orange porch paint.

Yes, orange porch paint. At this point you're probably wondering "They weren't possibly thinking of painting their porch orange...were they?" Yes, yes we were (and I still hope to - there is a lot of orange porch paint left). We have a small balcony off of our upper level master bedroom and my plan three or four years ago was to paint the balcony floor orange and stencil it with a moorish trellis pattern. (Again, a story for another day.)
DIY dog feeder
"WHAT DO YOU MEAN, A DIET?!?!"

So, I had a gallon of three year old orange paint. I can't remember the exact name of the paint color, but it was something like Birds of Paradise. When I opened the can and stirred it up, I realized the paint was the actual color of melted cheese. Seriously, I could've staged the paint with some Tostitos or elbow macaroni and no one would've known the difference.
DIY dog feeder
Despite my misgivings towards painting with a can of queso, I plowed ahead and got it done. It's not perfect, but it still looks decent:
DIY dog feeder
(What doesn't look decent is the state of our lawn...)

And most importantly, it's functional! Banjo and Gravy can both eat comfortably now:
DIY dog feeder
NOM.

DIY dog feeder
NOM NOM NOM.

I'm happy with the finished product. Tell me again, why didn't I finish this project sooner?!
DIY dog feeder
DIY dog feeder
Also, it's a HUGE improvement over the "feeding station" we were using before, which was putting the dog bowls on an old Igloo cooler. The following photo may turn your stomach:
old feeding station, ewwww!
BEFORE. (Alternate caption: EWWWWWW!)

DIY dog feeder
AFTER.

The fact that our old system was unattractive was the least of our problems. The bowls would move around on top of the cooler and get knocked on the floor. There were bits of dog food everywhere. The grossest part was that brown smear on the wall at bowl height: dog food mixed with dog slobber. Ewwwww! And we kept the water bowl on the floor so that Banjo, our shorter dog, could reach it which led to sloshing and gross floor tiles. The whole set up was just nasty, and I'm glad to be rid of it in favor of our new custom-built cheese-colored dog feeder. It's more ergonomic for the dogs and cleaner and more attractive for me. And it's done!

DIY dog feeder
"Hey lady, how about you stop messing around with the camera and put some food in this dish?!"
(I love how it looks like he has a nose ring in this pic! Goes well with his tattoos!)


Another summer project (finally) complete!

Friday, August 23, 2013

collections | from the farmers market

farmers market loot
We're big fans of the Falls Church Farmers Market. Last weekend's haul included corn on the cob, peaches, tomatoes, squash, eggplant, basil, cantaloupe, sausage, and cheese.

Also, we have a new favorite method for cooking squash: dipping it in cornmeal and frying it! This may not be the most healthy way to cook it, but we don't fry very often. I love squash, but it gets so boring - it's always mushy and rather flavorless no matter how I try to dress it up. Evidently cornmeal and oil are the secret to perfectly crunchy delicious squash. I'm obsessed with this technique and we've been eating cornmeal fried squash several times a week. I don't use a recipe - just cut the squash (yellow squash, zucchini, etc) into rounds, dip in milk, then dip in cornmeal (seasoned generously with salt, pepper, and your choice of seasonings: garlic powder, onion powder, herbs, cayenne, etc) and fry in 1/2" of hot vegetable oil until golden. So easy, and they turn out perfectly every time:
fried squash
Yum!

Tuesday, August 20, 2013

I made a quilt!

nana quilt
I made a quilt, and I have to say, I'm pretty freaking proud of myself for finishing it.

I tried to make my first quilt when I was 12. I stitched the squares together by hand. I think I got eight squares together before I called it quits. One, it was taking forever, and two, I realized I wasn't really a quilt person. Back then, the only quilts I was familiar with were patchwork squares and floral, which seemed rather country and cutesy to me. My taste runs modern, so when I saw all the modern quilts that started popping up on the internet about five years ago, I fell in love with the idea of making a quilt again. It seemed like a daunting project, though...the type of thing that I knew I would never finish, especially since my list of successfully completed sewing projects includes two sofa pillows, an iPad case, some felt garlands, a blind hem on a pair of dress pants, and a pillow shaped like a pig that I made for my seventh grade Home Ec class (which was inexplicably called "Teen Living" back then. I don't know many teenagers for whom sewing pillows shaped like farm animals was either an important life skill or part of their recreational lifestyle in 1992, but whatever, it was an easy A).
nana quilt
nana quilt
Anyway, I'm saying my sewing skills were questionable. I mean, I know how to sew...a skill I attribute more to osmosis than anything I learned in seventh grade Teen Living. My mother sews. She made me clothes when I was a kid, she sewed curtains, she even made my prom dress. However, it always seemed that my mom sewed more out of necessity than as a hobby - an impression I got because I can still envision her sitting in front of her sewing machine and cursing as she ripped out seams. Her projects always turned out well, but the process seemed so frustrating to me, that I was never really interested in learning to sew for fun.
nana quilt
I bought myself a decent sewing machine about four years ago and realized Hey, this isn't so bad. It's actually kind of fun. And so much faster than sewing by hand! Still, sewing a quilt was ambitious. But it fit my long-standing criteria for attempting sewing projects: 1. That it doesn't have to be worn, and 2. That it only involves sewing straight lines. I gathered up some more inspiration from the talented people of the internet, specifically Ashley's beautiful modern quilts, and Elise's can-do attitude and beginner's enthusiasm and decided that yes, I could sew a quilt.
nana quilt
nana quilt
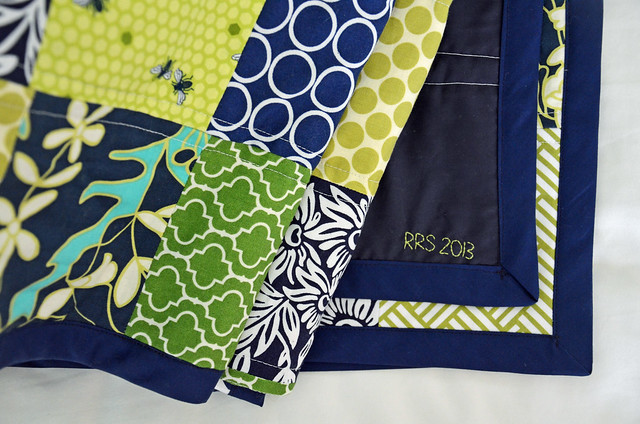
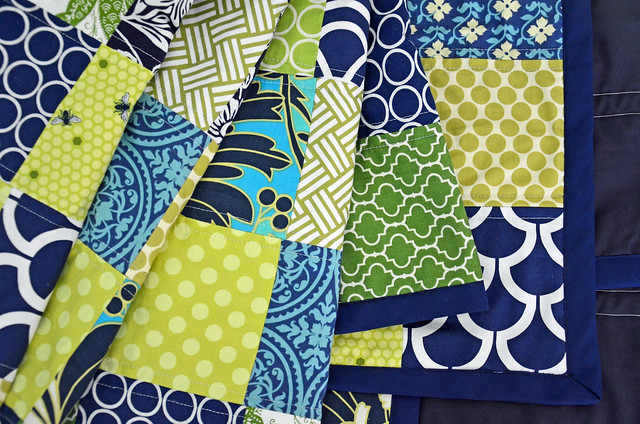
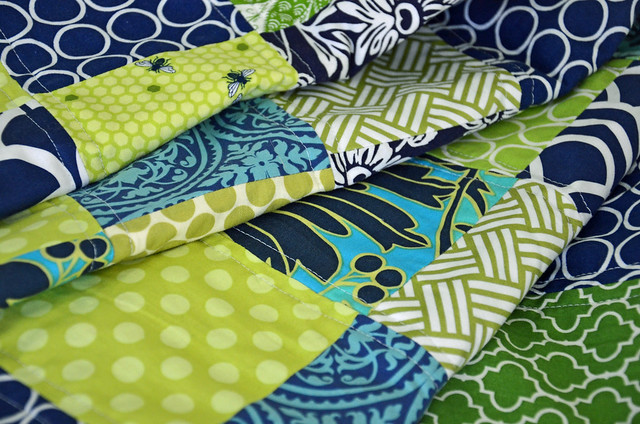
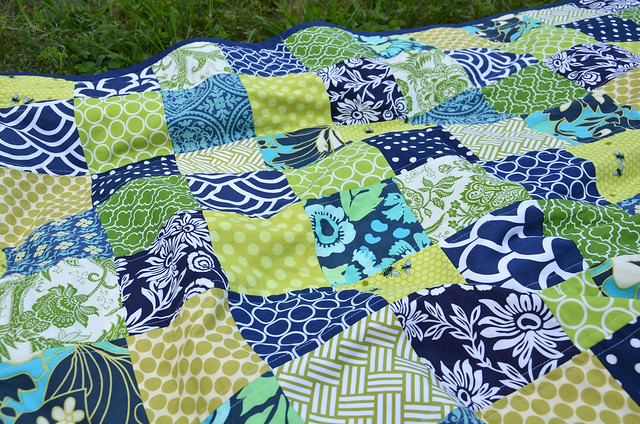
My plan was to make a modern half-square triangle quilt with solid colors, but then the idea of a blue and green patterned quilt popped into my head. These were my Nana's favorite colors - I think everything she wore was blue, green, or blue and green - and I still think of her every time I see those colors together. I knew then and there that I would make a Nana-inspired quilt, and bought a stack of blue and green fabrics to store away for my future project. (Honestly, I think that was four years ago.)
nana quilt
Now that I think about it, making a quilt in honor of my grandmother is kind of hilarious, considering that she was not at all the domestic type. She loved crossword puzzles, murder mysteries, and eating ice cream in bed with her cats, but she used her oven for storage and I never ever saw her sew. In fact, my mother spent most of her time in front of the sewing machine hemming my grandmother's pants, so I'm guessing that Nana didn't even know how to sew.
nana quilt
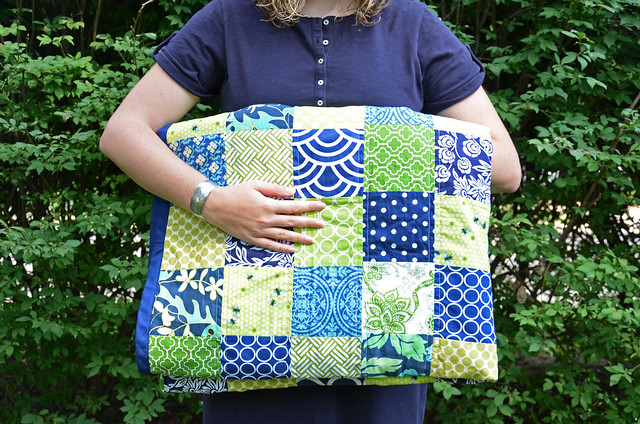
Anyway, I finally decided to tackle the blue and green quilt this summer and my goals for the project were GET HER DONE and EMBRACE IMPERFECTION. That was totally the way to go. I cut the squares and 
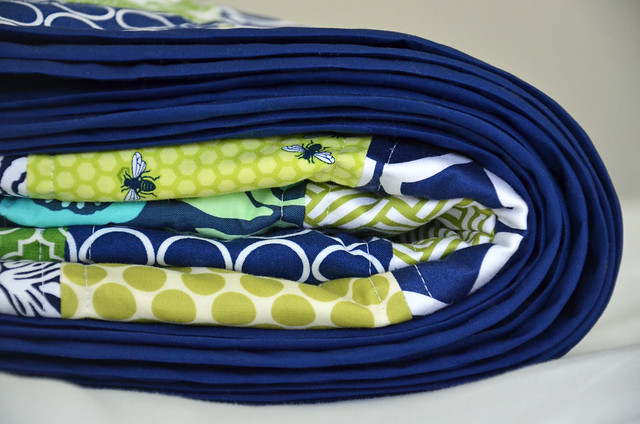
sewed the quilt top throughout a couple weeks in June. I took July off to prepare for art markets. And I put the whole thing together, basted, quilted, and attached the binding during the first week of August. Done!
nana quilt
nana quilt
nana quilt
nana quilt
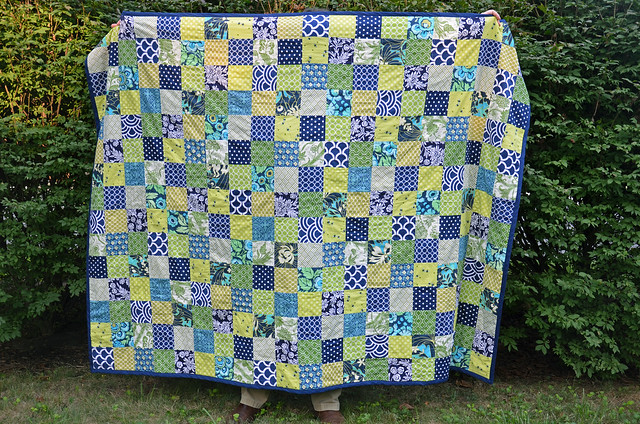
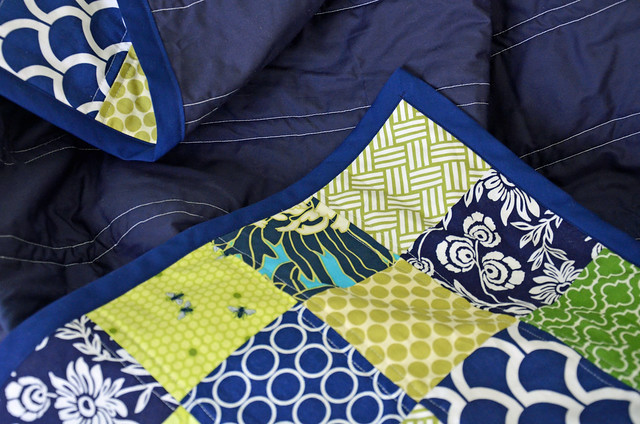
It's not even close to perfect, but it's handmade and the crooked seams, misaligned squares, and wonky binding are part of its character. Would an experienced quilter be appalled with my make-it-up-as-I-go "techniques"? Absolutely. But the quilt is done. And I knew that if I fussed with making sure everything lined up perfectly, I would get frustrated and never finish, and so if I messed up, I went with it. I learned a lot, I made mistakes, I powered through, and I finished it. (And I only cussed once - when I had major thread tension problems during the quilting stage and sewing with the walking foot led to a jumbled knot of thread and a flashing ERROR on my sewing machine. I eventually went back to quilting with the regular foot.)
nana quilt
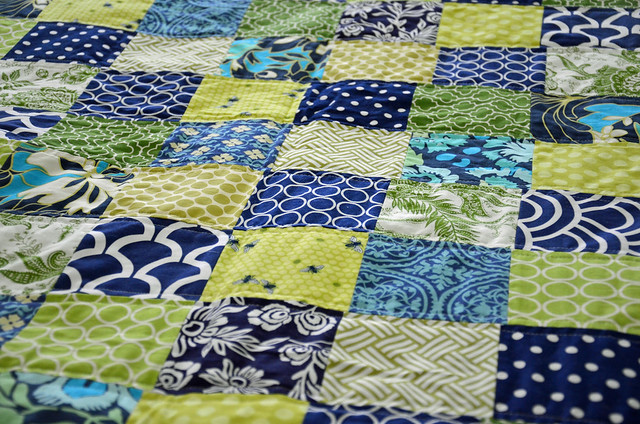
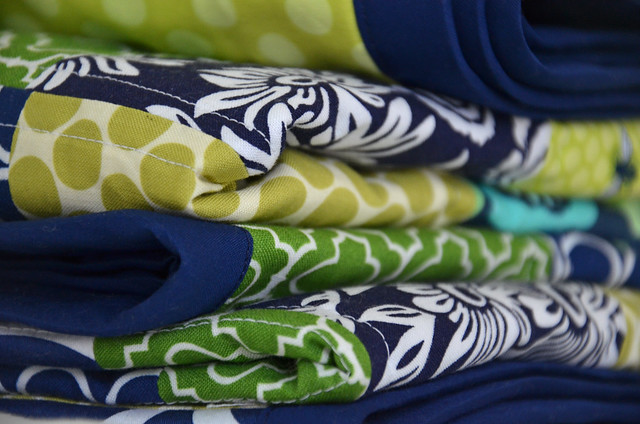
Ironic, that yes, I did end up making a square patchwork quilt after thinking that they weren't my style, but I have to admit that I love the finished product. And it totally reminds me of my Nana - the day I finished sewing it, I snuggled up underneath it and thought about her and it was just so comforting. (If only I had a bowl of ice cream, a couple cats, and Murder, She Wrote on the television!)
nana quilt
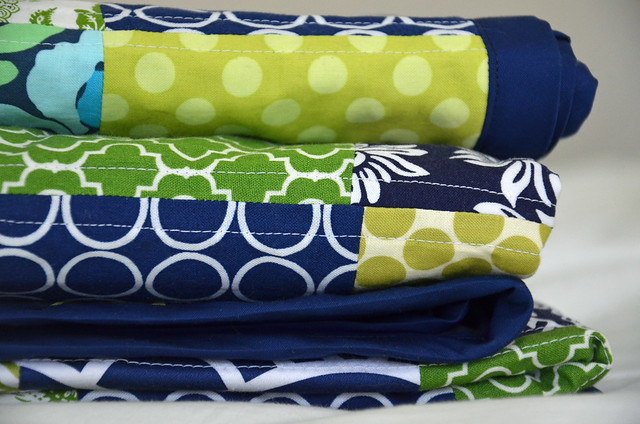
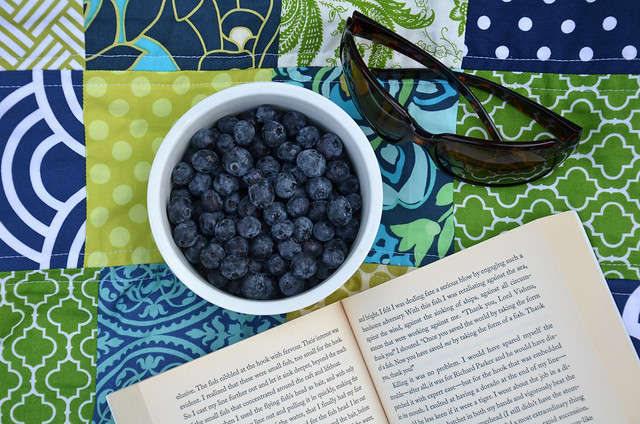
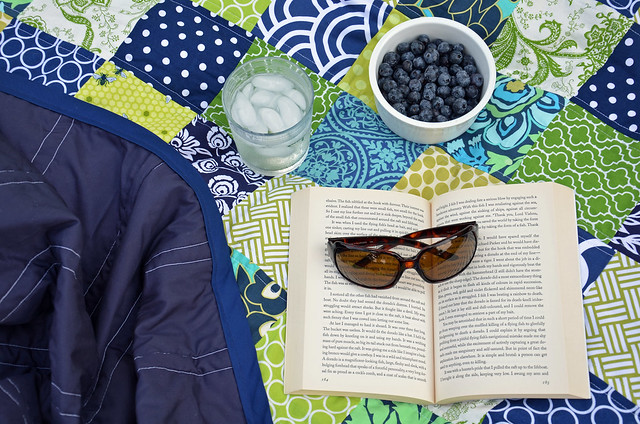
At 67"x88" it's smaller than a bed quilt (though it would work on a twin bed) but way too big for a sofa throw. My original plan was to use this as a picnic blanket, but I'm not sure I can bear to put it on the ground! (I eventually got over that. My Nana was a nature-lover and set insects free outside instead of squashing them, so it seems only right that the quilt be used outside.)
nana quilt
Who knew that sewing could be so enjoyable and satisfying? (WHO HAVE I BECOME??? Certainly, the Rachel from seventh grade Teen Living is rolling her eyes, but back then I didn't know the joys of sewing and drinking beer at the same time!) I'm addicted to quilting now. I have plans and fabric stashes for three more quilts, but I'm forcing myself to wait for cooler weather to work on them. The weather is still nice now, and it's beckoning me to lounge, read, and picnic on my new quilt...
nana quilt